Because jumping places repeated force through the feet, ankles, knees and hips, a thoughtful approach becomes essential, especially at the beginning, and focusing on low impact versions, correct posture, good rope length and sensible work–rest patterns can reduce unnecessary strain and help you build skill and stamina without feeling defeated or risking avoidable injuries.
This guide explains the fundamentals in a clear, dynamic but safety-conscious way, covering how to choose and adjust a rope, how to warm up properly, how to perform key technique elements, which beginner variations to learn first, how to organize a jump rope routine into structured sessions and how to track progress over time so that workout ways with jump rope remain enjoyable rather than overwhelming.
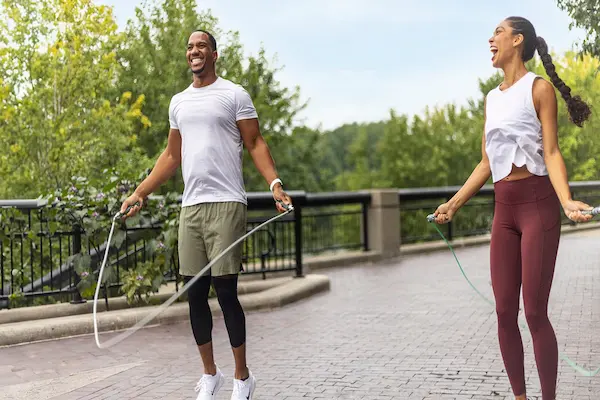
Why Choose Jump Rope as a Cardio Exercise Tool

Understanding the advantages of jump rope compared with other cardio exercise methods can help you decide how it fits into your broader fitness plan and how much emphasis you want to place on it within your weekly routine.
Key Benefits of Simple Gear like a Jump Rope
- Ropes usually cost far less than many other pieces of cardio equipment, which makes them accessible for beginners who want effective workout ways with jump rope without investing heavily at the start.
- A jump rope takes very little space to store and can be coiled into a bag or drawer, meaning you can perform a jump rope routine indoors, outside or while traveling with minimal preparation.
- Cardio exercise with a rope challenges coordination, rhythm and timing, so it engages both body and mind, often turning practice into a skill-building game rather than just repetitive movement.
- Short bouts of jumping can raise the heart rate quickly, which means that time-efficient sessions of just 5–15 minutes can still provide a meaningful stimulus, especially when combined with other workout components.
- Progress is easy to feel and measure through metrics such as longer unbroken sets, fewer trip-ups or more advanced footwork patterns, which keeps motivation high as your skill improves.
Considering these benefits together shows why many people use jump rope as either a primary cardio exercise or as a warm-up and coordination drill that supports other forms of training.
Choosing and Adjusting Your Jump Rope for Safety and Comfort
A rope that is too long, too short or poorly matched to your space can make even a simple jump rope routine frustrating, so taking a few minutes to adjust length, grip and material will pay off quickly in smoother practice and fewer trips.
Types of Ropes Commonly Used for Workout Ways with Jump Rope
- Basic PVC ropes – light, inexpensive and suitable for most beginners, often used for general cardio exercise and simple coordination drills.
- Beaded ropes – feature plastic beads along the cord, which give weight and visual feedback, making rhythm easier to see and hear, helpful for learning timing.
- Speed ropes – made with thin cables and small handles, designed for advanced work such as double-unders; these are usually not necessary for early stages and can be unforgiving if the cable hits bare skin.
How to Check Rope Length Step by Step
- Stand in the middle of the rope with one foot or both feet together, ensuring that an equal length extends to the left and right of your body.
- Hold the handles alongside your body and pull the rope tight upward, keeping your shoulders relaxed and arms down at your sides.
- Notice where the tops of the handles reach on your body when the rope is snug:
- For most beginners, handles that reach roughly between the bottom of the chest and the armpits provide a manageable length.
- If handles rise above shoulder height, the rope is likely too long and may tangle or slow your rhythm.
- If handles fall below the lower ribs, the rope may be too short and more likely to catch on your feet, particularly before your technique is consistent.
- Adjust length according to the rope design by:
- Tying simple knots near the handles for basic PVC ropes (keeping knots secure and even on both sides).
- Using built-in length adjusters or clamps for ropes that include them, following manufacturer instructions carefully.
Once length feels comfortable and balanced, you can focus more on learning movement patterns rather than wrestling with equipment that fights against you.
Warm-Up Tips Before Starting a Jump Rope Routine
Because jump rope involves repeated small landings and rapid arm movement, a focused warm-up prepares ankles, calves, wrists and shoulders for the forces and coordination demands of the main cardio exercise, thereby lowering the risk of strains.
General Warm-Up Sequence (5–7 Minutes)
- Begin with 1–2 minutes of brisk walking or marching in place, lifting your knees gently and letting your arms swing naturally to raise your heart rate slightly.
- Add ankle circles and calf raises, performing:
- 10–15 ankle circles in each direction per foot, carried out slowly while holding a wall or chair for balance.
- 10–15 calf raises where you lift your heels from the floor and lower them under control, focusing on smooth motion.
- Mobilize shoulders and wrists with:
- 10–15 shoulder rolls forward and backward.
- 10–15 gentle wrist circles in each direction, arms relaxed by your sides.
- Finish with 30–60 seconds of low-impact cardio such as step touches or light bouncing without the rope, keeping both feet close to the floor and staying loose through the upper body.
When your body feels warm, joints feel more mobile and breathing is slightly deeper yet still comfortable, you are better prepared to begin learning specific workout ways with jump rope without shocking your system.
Technique Basics: How to Jump Rope Safely and Efficiently
Proper technique keeps jumping smoother and less tiring, reduces impact, and minimizes the chance of the rope tangling on every swing, which is why spending time on fundamentals pays off even if it feels slow at first.
Posture and Body Position
- Stand upright with your head in line with your spine, eyes looking slightly forward rather than down at your feet, which encourages a neutral neck position.
- Engage your core muscles lightly by drawing the lower abdomen inward, which helps stabilize the trunk and reduces excessive arching of the lower back during jumps.
- Keep shoulders relaxed and slightly back instead of rounding them forward, allowing your chest to remain open and breathing to stay easy.
Hand and Arm Position for Rope Control
- Hold handles loosely yet securely, with fingers wrapped around them and thumbs resting along the top or side, avoiding a rigid, white-knuckle grip that may fatigue forearms quickly.
- Position hands slightly in front of your hips and a bit away from the body, roughly at the level of your belt line, and keep elbows close but not glued to your sides, forming a soft angle at the elbows.
- Generate most of the rope spin from the wrists rather than making large circles with the shoulders, since small wrist rotations are more efficient and easier to maintain at a consistent rhythm.
Footwork and Jump Height
- Use small, controlled jumps with both feet leaving the ground together or alternating gently, aiming to clear the rope by just a few centimeters, rather than jumping high as if attempting a large hurdle.
- Land softly on the balls of your feet, allowing heels to lower toward the floor naturally, and maintain slight knee flexion to act as shock absorbers for your joints.
- Avoid kicking feet backward or drawing legs too far up, as this can throw off timing and increase unnecessary effort.
Breathing and Rhythm
- Match breathing to your natural rhythm instead of holding your breath; for many people, inhaling over two or three jumps and exhaling over the next two or three creates a comfortable pattern.
- Count jumps or use music to establish rhythm, focusing initially on steady pace rather than speed, since smooth coordination matters more than going fast in early stages.
Remembering these basics each time you begin a jump rope routine will help you improve steadily, and returning to fundamentals whenever you feel clumsy or tired can restore balance to your technique.
Beginner Footwork Progression: From No Rope to Full Turns
Many beginners find it easier to first practice the jumping rhythm without the rope, because removing the cord reduces stress and creates a chance to learn timing and landing technique safely, so taking this phased approach can make more advanced workout ways with jump rope far less frustrating later on.
Phase 1: Shadow Jumping without a Rope
- Stand with feet hip-width apart, arms by your sides, and imagine holding handles even if you are not actually using them.
- Perform small jumps where both feet leave the ground together, landing softly and keeping time with an imaginary rope swing, for intervals of 10–20 seconds followed by short rests.
- Add gentle wrist rotations as if turning an invisible rope, matching hand movements to each jump, continuing this drill for several shortened sets until rhythm feels smoother.
Phase 2: Single Swings with Rope, No Continuous Jumps Yet
- Hold the rope behind you with hands at your sides, then swing it over your head and let it land in front without jumping, simply stepping over it.
- Repeat the swing and step pattern, gradually adding a small hop as the rope reaches your feet, but allow the rope to stop after each jump to reduce timing pressure.
- Work toward linking two or three individual swings and jumps, then let the rope rest so you can reset posture and grip before another small sequence.
Phase 3: Continuous Basic Bounce
- Once you feel comfortable with single swings, attempt a series of continuous jumps at a gentle pace, aiming for short sets such as 10–20 jumps without stopping.
- Focus on keeping jumps low, arms relaxed and breathing steady, and pause after each set to shake out tension before the next attempt.
- Gradually increase the length of unbroken sequences as your coordination and stamina improve, but return to shorter sets if form begins to deteriorate.
Building confidence through this kind of progression can transform the feeling of “I cannot jump rope” into a manageable series of steps that lead to smoother practice over time.
Basic Jump Rope Variations for Added Variety
Once the basic bounce becomes more comfortable, you may want to include simple variations in your jump rope routine to keep sessions interesting and to challenge coordination from different angles without straying too far from beginner friendly intensity levels.
Beginner-Level Variations
- Alternate foot step – mimic a light jogging motion where one foot lifts slightly higher than the other on each turn, yet keep jumps low and impact gentle.
- Side-to-side shift – during the basic bounce, shift your weight slightly to the right and then left as you land, imagining you are jumping from one small line to another on the floor.
- Front-back step – alternate landing with one foot slightly in front of the other and then switching positions every few jumps, which subtly alters balance demands.
- Boxer step (very gentle version) – transfer weight from one foot to the other with minimal lift, allowing heels to shift slightly while staying mostly grounded, which can reduce impact and give calves brief micro-breaks.
These simple variations can be slotted into routine segments for just a few seconds at a time, making coordination practice feel playful rather than overwhelming.
Routine Examples: Structured Workout Ways with Jump Rope
Organizing your jump rope routine into clear blocks of warm-up, work and cool-down helps you stay focused, and using time-based intervals rather than counting individual jumps often feels less complicated in the early stages.
Routine 1: Five-Minute Intro Session
This micro-session suits absolute beginners or days when energy is low but you still want to maintain the habit of moving.
- Warm up for 2 minutes with marching, ankle circles and shoulder rolls.
- Perform 20 seconds of shadow jumping (no rope) followed by 40 seconds of easy march or step touch; repeat this work–rest pair three times.
- Finish with 1 minute of slow walking around the room and simple calf and chest stretches.
Routine 2: 10-Minute Beginner Jump Rope Routine
Once you can perform short continuous jumps, this easy structure introduces simple intervals with plenty of recovery time.
- Warm up for 3 minutes using the general warm-up sequence described earlier.
- Do 20 seconds of basic bounce with the rope, followed by 40 seconds of gentle marching; repeat this pair four times for a total of 4 minutes in the main portion.
- Add 1–2 sets of 20 seconds of alternate foot steps with 40 seconds of recovery, only if you feel comfortable and balanced.
- Use the remaining time for cool-down, walking slowly and stretching calves, hip flexors and shoulders.
Routine 3: 15–20 Minute Low-Impact Jump Rope Routine
This slightly longer routine suits days when you feel ready for more volume, still keeping intensity moderate.
- Warm up for 4–5 minutes with dynamic movements, including a short shadow-jumping segment.
- Complete a circuit of:
- 30 seconds basic bounce.
- 30 seconds rest or slow walk.
- 30 seconds alternate foot step.
- 30 seconds rest.
- 30 seconds side-to-side shifts with the rope.
- 30 seconds rest.
- Repeat the circuit two or three times based on how your body feels, taking extra rest if breathing becomes too heavy to speak simple phrases.
- Cool down for 4–5 minutes with walking, calf and hamstring stretches and relaxed breathing.
These routine templates can be adapted according to rope length, available space and personal comfort, and over time you can gradually extend the work intervals or reduce rest periods, always adjusting carefully.
Tracking Progress with a Jump Rope Routine
Recording small details about each session helps many people stay motivated, because visible improvement in stamina, coordination or consistency reinforces the effort you are investing in workout ways with jump rope.
Progress Measures You Can Monitor
- Duration – total time spent in active intervals across a session or week, which can gradually increase as your stamina grows.
- Unbroken jumps – the longest sequence of continuous rotations without tripping, a simple way to track coordination improvements.
- Interval structure – how long work and rest intervals last; for example, progressing from 20 seconds work and 40 seconds rest toward 30 seconds work and 30 seconds rest over weeks.
- Footwork variety – the number of variations you can perform comfortably (basic bounce, alternate foot, side-to-side shifts, boxer step), which shows skill expansion.
- Perceived effort – how hard sessions feel on a simple scale from 1 to 10, recorded in a journal to highlight when the same routine begins to feel easier.
Simple Logging Template
DATE:
TOTAL MINUTES:
ROPE TYPE / LENGTH:
INTERVAL FORMAT (e.g., 20s on / 40s off, 8 rounds):
VARIATIONS USED:
LONGEST UNBROKEN RUN (approximate count or seconds):
EFFORT RATING (1–10):
NOTES (comfort, aches, energy, music used, etc.):
Updating this sort of log after each jump rope routine only takes a minute and helps create a clear picture of your journey from hesitant beginner to more confident jumper.
Weekly Planning with Workout Ways with Jump Rope
Deciding in advance which days will include rope work helps integrate it smoothly into your life, so you are less likely to forget or postpone sessions indefinitely when work or family schedules become busy.
Example Weekly Plan for a New Jumper
- Day 1 – Five-minute intro session plus a short walk.
- Day 2 – Rest from jumping, focusing on light stretching or walking only.
- Day 3 – 10-minute beginner routine using 20s on / 40s off intervals.
- Day 4 – No rope; consider core and mobility exercises instead.
- Day 5 – 10–15 minute circuit including a mix of basic bounce and alternate foot steps.
- Day 6 – Optional short session (5–8 minutes) or full rest depending on how your joints and energy levels feel.
- Day 7 – Rest or very gentle movement such as walking or stretching.
Adjustment Suggestions
- Shift sessions forward or backward a day if you feel extra tired, sore or busy, remembering that consistency across weeks matters more than strict adherence to specific days.
- Combine rope work with other low impact cardio options, bodyweight strength work or flexibility training as your capacity grows, always increasing total workload gradually.
- Pay attention to any signs of overuse in the calves, shins or knees, and respond by reducing jump volume temporarily, using more shadow jumping or other cardio exercise forms while discomfort settles.
Viewing jump rope as one piece of a weekly movement puzzle helps prevent burnout and makes it easier to maintain enthusiasm and safety over the long term.
Common Mistakes and How to Avoid Them
Knowing where beginners often struggle can help you bypass some frustration, because awareness of typical errors allows you to adjust technique before habits become firmly established.
Frequent Jump Rope Technique Errors
- Jumping too high, which increases impact and makes timing harder, often leading to quick fatigue and more frequent tripping.
- Using large arm circles instead of controlled wrist rotations, causing the rope to travel inconsistently and shoulders to tire quickly.
- Letting the head drop forward and shoulders round, which reduces breathing efficiency and can strain the neck.
- Wearing shoes with poor cushioning or support, particularly on hard surfaces such as concrete, which increases stress on joints.
- Skipping warm-ups and cool-downs, which may contribute to calf tightness or soreness after sessions.
Practical Fixes for These Mistakes
- Practice low, quick jumps in shadow form first, focusing on quiet landings, then transfer this height to rope sessions.
- Stand in front of a mirror if possible and watch your arms, aiming to reduce shoulder movement and shift effort toward small wrist circles.
- Use alignment checks periodically: imagine a string lifting the crown of your head toward the ceiling, shoulders soft and ribs stacked over hips.
- Choose a moderately cushioned athletic shoe and, when available, jump on surfaces such as rubber mats or wooden floors rather than bare concrete.
- Schedule at least two minutes for calf stretching and gentle walking after each session to cool down tissues that worked hard.
Addressing these points early helps solidify safer, more efficient movement patterns, which in turn supports smoother progress and a more enjoyable experience with workout ways with jump rope.
Listening to Your Body and Knowing When to Get Advice
While jump rope can be a powerful and fun cardio tool, certain signs signal the need for caution or professional input, and respecting these signals protects your long-term ability to exercise and enjoy everyday life.
Warning Signs to Take Seriously
- Persistent pain in the shins, ankles, knees or hips that gets worse with jumping or walking and does not improve with rest and gentle stretching.
- Sharp chest pain, extreme breathlessness, dizziness or faint feelings during or after sessions, especially if such symptoms have not been evaluated previously.
- Noticeable swelling, redness or warmth in a joint after rope work that does not settle within a reasonable period.
Situations Where Professional Guidance Is Especially Helpful
- Existing heart or lung conditions, recent major surgery or long-standing joint problems where a doctor or physiotherapist can help you adapt workout ways with jump rope appropriately.
- Ongoing uncertainty about technique, or frequent tripping and discomfort despite careful practice, when a coach or trainer could provide form corrections and customized adjustments.
- Desire to progress from beginner-level routines to more advanced jump rope skills such as faster intervals or complex footwork while minimizing injury risk.
Combining personal body awareness with timely professional advice ensures that your jump rope routine stays aligned with your health status and goals instead of working against them.
Final Thoughts: Making Jump Rope a Friendly Part of Your Fitness Journey
A jump rope can become a surprisingly effective companion on your path toward better fitness, serving as a portable tool for cardio exercise, coordination practice and mental focus, all wrapped into short sessions that can fit into busy days when more complex training would be impossible.
By choosing appropriate rope length, following safety-conscious warm-up steps, practicing technique fundamentals, progressing through beginner-friendly variations, organizing sessions into manageable routines and tracking small improvements over time, you can use the workout ways with jump rope described here to build stamina and skill in a way that feels dynamic yet still considerate of your limits.
Approaching jump rope practice with patience, curiosity and respect for your body’s signals helps ensure that this simple gear remains a fun, sustainable part of your overall movement routine rather than a source of frustration, and with consistent but gentle effort, you may find that your coordination, breathing and confidence grow steadily alongside your ability to keep the rope turning smoothly.